Sunday, October 7, 2012
Thanksgiving 2012 - Fun with Pecans
Wednesday, August 3, 2011
Champagne Cupcakes with Champagne Cream Cheese Icing
Pink Champagne Cupcakes
Makes 2 dozen cupcakes.
CUPCAKES
1 cup (2 sticks) salted butter, room temperature
2 cups sugar
1 tsp vanilla
6 egg whites
3 cups all purpose flour
3 tsp baking powder
½ tsp salt
2-3 drops red food coloring (instead of food colouring I threw in 4-8 frozen raspberries)
1 cup champagne (I used extra dry Prosecco, but the recipe recommends sweet)
CREAM CHEESE ICING
8 oz (250mg) cream cheese, room temp, cut into cubes
1/2 stick unsalted butter, cool, cut into cubes
1/2 c white sugar (I can't eat powdered sugar, but you could use that, too)
1/4 c champagne
1/2 tsp vanilla extract
PREPARE BATTER
Preheat oven to 350 degrees. Prepare muffin tins by lightly buttering or using muffin cups.
In a medium sized bowl combine flour, baking powder and salt.
In a mixing bowl beat together butter and sugar for 3-5 minutes until light and fluffy. Add vanilla, then beat in egg whites one at a time. Add a few drops of food coloring (or in my case, throw in the frozen raspberries) until the batter is the color of your preference.
Add in flour mixture and champagne in three alternating additions, beginning and ending with the flour mixture. Pour batter into cupcake liners, filling ⅔ full. Bake for 20-30 minutes, or until toothpick inserted into center comes out clean.
PREPARE ICING
In a mixer on medium speed, cream the cream cheese and butter until smooth. Reduce speed and add the sugar. Increase speed again for about 2-4 minutes, until sugar well combined and mixture is smooth. Reduce speed and add the champagne and vanilla extract until just combined; overmixing at this point will make the icing too runny.
NOTE: My icing tasted a bit too much of champagne (I know!) so in future I would reduce to 1/8 c or even omit, depending on how champagne-y my cupcakes tasted.
Tuesday, May 3, 2011
Lemon Cardamom Ricotta Babycakes
So I made these:
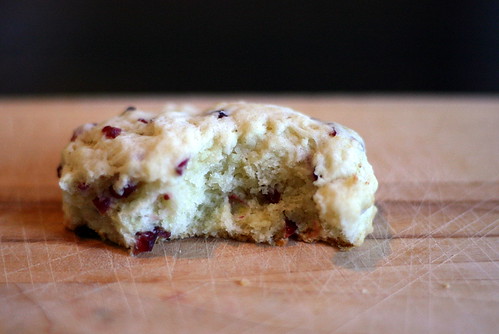
(Sorry for the poor photo quality.)I combined a few online recipes and added some lemon zest and cardamom and: AMAZEBALLS. I call them babycakes because they have a soft, cakey texture inside when baked.
You're welcome.
Ingredients:
1/2 cup unsalted butter, room temp
1 cup white sugar
1 egg, room temp, whisked
1 cup ricotta cheese
zest of one lemon
1 tsp vanilla
2 cups flour
1/2 tsp salt
1/4 tsp baking soda
1/4 tsp baking powder
1/2 tsp ground cardamom
Glaze (optional - I didn't try it)
1 cup icing sugar (I'm allergic to corn, so I can't have this)
3 Tbsp milk
1 Tbsp lemon zest/finely grated lemon rind
To do:
Preheat oven to 350.
In the gorgeous stand mixer that you got from your adoring boyfriend last Christmas (or with whisk), cream butter and sugar until fluffy. Beat in egg, ricotta cheese, lemon zest and vanilla, mixing well after each addition.
In a separate bowl, sift together flour, salt, baking soda, baking powder and cardamom. Whisk to combine. With mixer on lowest setting, add to ricotta mixture. Mix on medium until incorporated.
Drop by tsp/Tbsp onto cookie sheet lined with parchment paper (or Silpat). Using the back of the spoon (or your fingers), spread the blobs out a bit so they bake evenly. Bake until bottoms start to brown, about 12-15min (15min worked for me). Remove from oven and allow to cool before removing from cookie sheets (about 2min). Move to wire rack to continue cooling.
Glaze: In small bowl, whisk together icing sugar, milk and lemon rind until smooth. Dip tops of cookies into glaze. Let stand on rack until icing is set, about 30min.
Tuesday, June 1, 2010
Pear and Blood Orange Salad
Thursday, February 25, 2010
Banana Cake with Broiled Caramel Topping (Neighbour Cake)
INGREDIENTS:
Cake
1/2 C Butter
1 1/2 C white sugar
2 eggs, well beaten
1 C (plus) mashed ripe bananas
1 tsp vanilla
2 C flour
1/2 tsp baking powder
3/4 tsp baking soda
1/2 tsp salt
1/4 C buttermilk
Caramel Topping (This is 1.5 times the amount called for in the original recipe.)
1/2 C chopped pecans (or shredded coconut)
4 1/2 Tbsp melted butter (no substitutions)
3/4 C brown sugar
1 1/2 Tbsp cream
Preheat oven to 350 degrees F. Cream butter and white sugar together, then beat in eggs, bananas and vanilla. Sift together flour, baking powder, baking soda and salt. Add to creamed mixture alternately with milk, beating well after each addition. Bake in greased and floured 9"x9" pan at 350 F for 50 to 60 minutes. (I check it after 40 minutes - it's usually done, maybe because I often bake it in two smaller foil pans.) I once got this far reading one of my aunt's recipes where it said, "Remove from oven."Your call.
Meanwhile, combine topping ingredients. Spread over warm cake in pan and brown under broiler until bubbling. If you think you might start clean-up while the cake is under the broiler, I would advise against it. The nuts can burn very, very quickly. Besides, it's kind of fun to watch those bubbles appear. I've made this countless times and I can attest that the longer you can broil it without burning, the better. I keep rotating and moving the pan around for a couple of minutes, watching the nuts for signs of burning with an eagle eye. Eagle eye not included in recipe.
Monday, February 22, 2010
Peanut Butter Banana Muffins
I got this recipe from Epicurious.com, my new favourite iPhone app, but you can also visit the website: www.epicurious.com.
INGREDIENTS
- 1 3/4 cups all purpose flour
- 1/4 cup toasted wheat germ (I substituted a bit of whole wheat flour)
- 1 teaspoon baking soda
- 1/2 teaspoon salt
- 1 cup mashed ripe bananas (about 3 or 4 medium)
- 1/2 cup honey
- 1/2 cup chunky peanut butter (I used smooth and added a handful of crushed roasted almonds and cashews)
- 2 large eggs
- 1/3 cup vegetable oil (I don't use vegetable oil so I added 1/4 cup of olive oil instead; I figured the peanut butter would have enough oil in it)
- 1/4 cup (packed) dark brown sugar (I used light brown sugar and it was fine)
- 1 teaspoon vanilla extract
Preheat oven to 400°F. Line 12 muffin cups with muffin papers. Sift first 4 ingredients into a small bowl to blend and set aside. In a medium bowl, beat bananas, honey, peanut butter, eggs, oil, sugar and vanilla to blend. Beat in flour mixture. Divide batter among muffin cups.
Bake muffins until tester inserted into center comes out clean, about 20 minutes. Transfer muffins to rack; cool. Makes 12 large muffins, or 24 small-ish muffins which fit into mason jars and look super cute on the kitchen counter.
Enjoy!
Monday, January 4, 2010
Scalloped Creamy Corny Potatoes
Monday, September 28, 2009
Monday, September 14, 2009
Tomato Sauce
Sunday, September 13, 2009
Tarragon Vanilla Bean Ice Cream
2 c (500 mL) half and half (or 1 c milk, 1 c heavy cream)
1 vanilla pod, sliced down the middle
Generous handful of fresh tarragon
4 large egg yolks (freeze the whites to make egg white quiche or meringues)
1/2 c white sugar
HEAT: Place cream, vanilla pod and tarragon in a saucepan and slowly bring to a boil, stirring often. Let infuse for 15-20 min, then remove the vanilla and scrape the seeds into the cream mixture. Discard the empty pod. Remove saucepan from heat and pour through a sieve into a large measuring cup or bowl and let cool slightly. (Don't worry if you can't smell the tarragon - the flavour continues to intensify throughout the process.)
WHISK: In a stainless steel bowl beat the egg yolks and sugar until light and fluffy (2 min). Gradually pour the infused cream into the whipped egg mixture, whisking constantly so the eggs don't curdle. I like to add the hot cream in small doses, then whisk, then add, etc. If any lumps do form, simply strain the mixture before moving onto the next step.
CUSTARD: Most ice cream recipes are just fancy custards, so now you are about to embark on the tedious custard part of the journey. Place the stainless steel bowl over a pot of simmering water (or use an actual double boiler, which would involve transferring your custard mix to another container, a step I'd rather just omit). Stirring constantly with a wooden spoon, cook until the custard thickens enough that it coats the back of a spoon. (The "spoon test" works like this: the film of custard on the back of the wooden spoon should stay in place when you draw a line with your finger through the middle of the custard.)
CHILL: Remove from heat and transfer to a glass bowl, continuing to stir the mixture for a few minutes so it does not over-cook. Cover bowl with a towel and let cool to room temperature before refrigerating until it is completely chilled (overnight).
ICE CREAM: If you have an ice cream maker, pour the mixture into the chilled container and follow the ice cream maker instructions. If you don't have an ice cream maker, as I said above, you can just churn it yourself every 15 or 20 min. I've never tried this method, so you'll have to ask Jamie Oliver, from whom I got this pointer.
SERVE: I made a spicy plum compote to serve with my tarragon ice cream (oven roasted plums with cinnamon, ginger, brown sugar, honey, and cloves), but you could serve it with whatever you like. If you chose to use 100% cream, the ice cream will be incredibly rich so you only need about two teaspoons per serving, served in little white ramekins or tiny teacups.
ENJOY!
Wednesday, July 8, 2009
Experimental Garlicky Rosemary-y Lemony Potatoes
Sunday, July 5, 2009
Grilled Cauliflower or Asparagus
Tuesday, June 30, 2009
Salmon Dip for Emergency Use Only
Saturday, June 27, 2009
Honey/Mustard Sauce for Chicken
Wednesday, May 6, 2009
Good Food in a Box, Delivered Right To My Door
I have just signed up for a food share program in Toronto! Every week, a box of fresh, locally grown produce will be delivered to my door. After researching several of these programs in Toronto, the service I decided on is Mama Earth Organics. Gavin and I love to cook, and I think this will be a tasty and inspiring way to enjoy local food over the summer. I am anticipating exploring less common vegetables that will surely send me scurrying to my cook books (and this blog!) to find new ways to prepare them. I am also excited that I won't be buying the wilted, dirty, truck-ripened produce from the grocery store across the street. It may be convenient, but it's also scary!
Just wanted to share my exciting food news!